Showing posts with label Instruments. Show all posts

Wednesday, February 24, 2010

#25


Click here to buy this piece of awesomeness.

This is a new one I cooked up. It's a nice little keyboard which makes some crazy sounds.

I added two potentiometers, one distorts the tones which emanate from the speaker area when you press a key. The other slowly fades in a tone, and distorts the original tone. Really, words will never adequately describe the sounds this thing can make, which is why I made a video for you. But really, the only way you're ever going to truly know what kind of sounds this truly wonderful machine can make, is to buy it.

I also added a 1/4" output jack for all your outputting needs. We all have different outputting needs, so I added the most ubiquitous connector. You're welcome.

Tuesday, February 23, 2010

#19 update


Click here to buy this

I added another knob to this one which fades in a tone. You can pitch a note played on the keyboard down, until it is playing a constant sound, maybe a singular tone, maybe a glitched out stream of tones, and squeaks and squeals. You can then fade in the tone controlled by he second knob to combine the two. It really creates a lot of possibilities.

#24


Click here to buy this

I made this instrument from the amp that's in these pc speakers. It's a pretty good noise maker. It has pretty good range, and can do some interesting things, as evidenced in the videos.

You can feed other signals into it, and have it modulate the sound. This is done by using the green 1/8" jack and cable that used to be the pc peakers input.

You can feed the signal from the instrument out into your amp in two ways. One, through the 1/8" jack on the front, which used to be the headphone jack. The sound fed through this jack is not what you'll hear from the built in speaker, though. I use this method to apply an interesting vibrato effect to my little keyboard.

The second method to feed the signal out is through a 1/4" jack I added to the top of the instrument. This signal is the exact same as heard from the internal speaker.

This instrument is powered by an a/c adapter, which is included.

Wednesday, February 10, 2010

#23(puff)

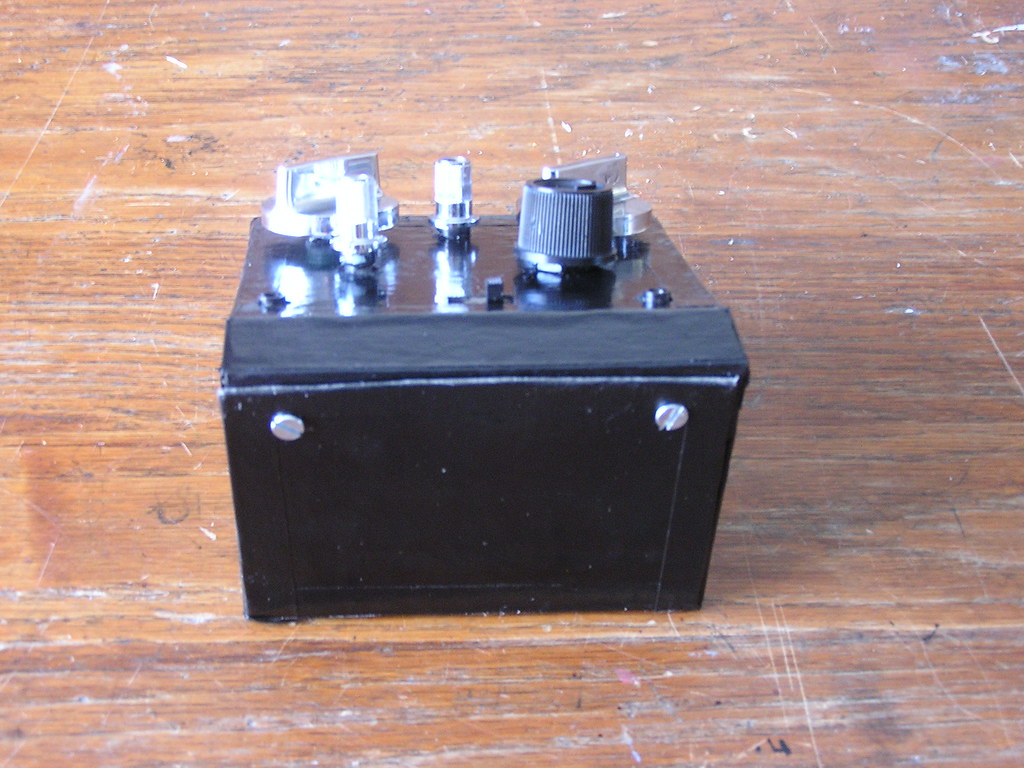
This here is a very unique item, which I have named "puff", only cause its housed in a power puff girls tin.

Click here to buy this

You have a switch that turns on the whole thing-a-ma-jig, located on the top of the machine.

Now the interesting part: the knobs. Those knobs are really where the whole thing comes together. Without them, this thing would only be mildly amusing, instead of super... amusing. Turn 'em any which way, and you'll be pitched up, down, right, left, and through dimensions you are too afraid to even question the existence of. Just make sure that once you feel a moderate amount of resistance, you quit turning the knob, cause you might break it (out of pure excitement, not cause they're faulty knobs.

In all seriousness, it is a good little sound maker, which can be sampled from, or played through your other synths, or played straight.

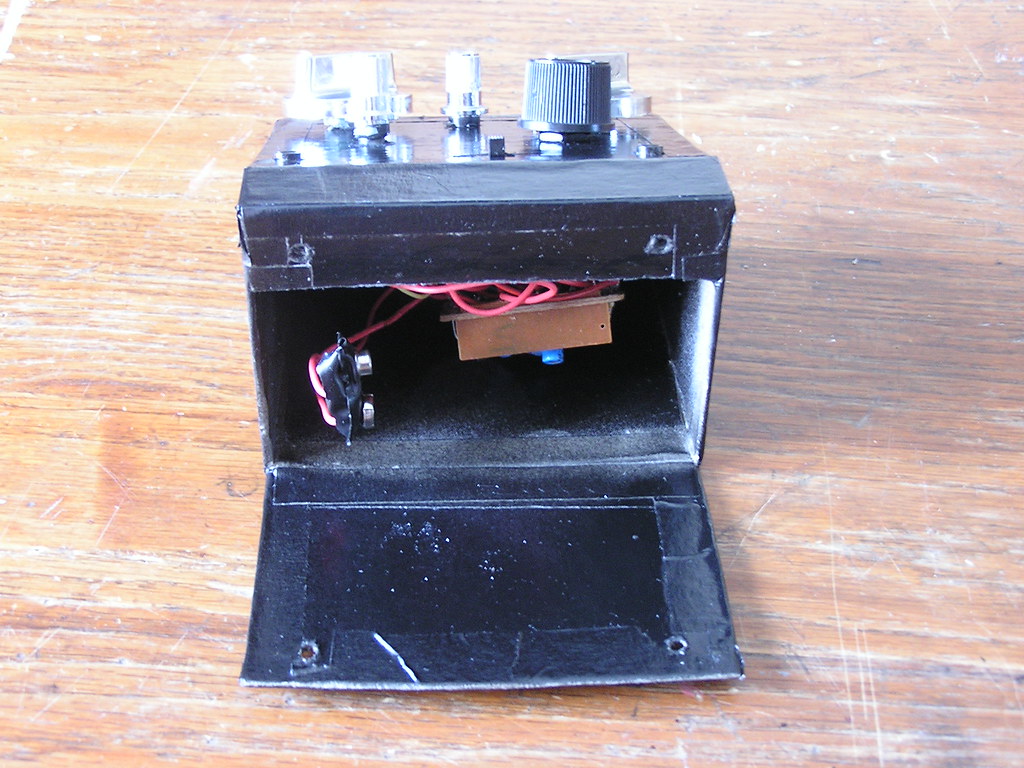
I have included pictures of how one might want to change the batteries, should that ever be an issue.

Tuesday, December 8, 2009

22, or “Super”


This here is a very unique item, which I have named "super", only cause it was the most available word for gluing. It is super though. I did construct it, if my memory serves, from a radio, and a voice changer, plus some knobs, and switches, and audio jacks.

You have a switch that turns on the whole thing-a-ma-jig, located on the left of the machine, below the first audio jack, which just happens to be an input. There are also two more switches. Both have different effects when switched on, or off, or even vice versa. In the right top corner you will find the second audio jack (both are 1/8th inch, by the way) and that one can be used as your output, but I'm not the boss of you, so you go ahead and do whatever feels right with it.

Now the interesting part: the knobs. Those knobs are really where the whole thing comes together. Without them, this thing would only be mildly amusing, instead of super... amusing. Turn 'em any which way, and you'll be pitched up, down, right, left, and through dimensions you are too afraid to even question the existence of. Just make sure that once you feel a moderate amount of resistance, you quit turning the knob, cause you might break it.

This piece can generate it's own tones, distort them, and you can pitch them up and down. It can also have other signals fed through it, as evidenced in the videos I will post links to. In all seriousness, it is a good little sound maker, which can be sampled from, or played through your other synths, or played straight.

Monday, September 1, 2008

#20

If you think you deserve this, click here, for etsy or here for ebay.

Here is #20. It basically has three pitch knobs, two of which I added. They all pitch it down, but with pinpoint precision. The effect is quite good. I also added an rca output, but normally I would have added a resistor to fine tune the audio signal, as sometimes it can sound kind of funny. But this time I didn't, to see if folks might prefer it. In the video it is playing through its own speaker, the sound file below it is what I recorded coming from the output.


#19

Is this item your bag? Click here to inform me of your intent to purchase.

Number 19 is pretty sweet. It has a pitch knob. Turn it one way, it pitches down, till it starts to glitch out, turn it the other way it pitches it up until it glitches out. If you pitch it too high it can become unstable and die. The best way to get it back, that I have found, is to take a battery out, and reinsert it, or if that fails take a battery out and insert it backwards, then reinsert it correctly. It is real easy to recognize if you have it pitched too high, and very easy to avoid. Along with the pitch knob is an 1/8" output jack I have added. Video:

#18

Want to buy this thang? Click here to do so.

Here is #18. I had some troubles with it. Apparently what circuit controls the demo, is different from the circuit which generates tones for the keys. I had the thing in demo mode while bending it, then I switched it over to play mode, and none of my bends worked. I figured whomever would rather have bends which affected it while in play mode rather than when in demo, so I rebent the thing, to, in my opinion, much better results. Makes some crazy sounds. It was rather sensitive to touch, so I added body contacts, four to be precise. I also added an 1/8" output so you can sample it, play it through an amp, or possibly stick an 1/8" jack in your mouth and feel the current, though I doubt that would be enjoyable. Video next:

Tuesday, August 26, 2008

#17, my first guitar

Lookin to blow some cash? Why not blow it on this item? Click here to purchase this.


I bought this guitar, and it was non-functional, a rare occurrence with thrift store purchases, so I opened 'er up, and located my problem. Some one had failed to properly secure the lead from a capacitor. I fixed that, and it works awesome now. I wired up a pitch bend, and called it a day.

I guess I'm on #16?

I need to eat, and you need to make noise, so lets work something out. Click here to purchase this machine.

I finished this synth I began a while ago. It is based off of this voice changer that one may purchase at wal-mart for six buckaroos. It is circuit bent of course. Originally it came with a mic and maybe three or four different voice settings, like "alien", "monster", and such like. I took the speaker out, wired that to two fourth inch jacks, took the switch, which changed the voice setting, out and rewired that to a six position rotary switch, and added in two potentiometers, or variable resistors, to change the effects. It produces its own audio signal which can be altered by turning the potentiometers, flipping toggle switches, or by switching which voice setting its on.


Sunday, February 24, 2008

had a good day

Man, I found some stuff yesterday at that old thrift store. I had plans to make the rounds of thrift stores in my area, but didn't need to hit all three, cause I found these:

Casiotone MT-210


Casiotone MT-45


Casio SA-35


Talk about luck eh? These go a long with my other thrift store find of the Casio SK-1. Neato. I know that the SA-35, and the MT-45 work, but I haven't gotten round to taking the MT-210 apart, and whatnot. Lokin' forwad to it.

Tuesday, February 5, 2008

hey

Just sold this and thought I would give an overview of its operation. It is fair to say that there is very little information that I could give which would make a person completely able to play it right off the bat. A good amount of experimentation will be required.

At the right you can see the switch which was previously hidden under a sticker. The switch has three settings which simply change the distortion.


If one wanted, one could use the machine to apply an effect to, say, a guitar or other signal passed through it. To do so you would just flip the top switch, turning on the "modulation" circuit, and plug your external signal source into the input.


If you wanted to hear the sounds the machine can make on it's own flip all the switches, as pictured.


The battery packs:

Friday, November 30, 2007

#15


#15
Originally uploaded by preposterousman
Here it is everyone. It took me a while to finish this. Believe it or not the hardest part of bending, for me at least is trying to come up with, or build enclosures. This time I made one out of cardboard. Looks pretty sharp doesn't it?

Yep, the enclosure is made of a stiff cardboard, and is painted with some pretty sweet spray paint. It is all shiny and nice. The knobs (4 out of 5) are off of a vintage television.

It has an 1/8" input, and output, and five distortion knobs. It is designed to modulate the input of other electronic instruments, but it can produce its own sounds, and quite well.

It takes one 9v battery.


I think most of the sound samples work now. If they happen not to, just wait a while, or come back again, or if you're real desperate to hear em', just leave a comment, or email me, and I will give them to you. Also if you are annoyed by the lack of sound file dependability, and believe in what I am doing, give me some money.

On two, or three, I can't remember, I had to use the laptop mic for lack of sufficient cables and adapters, so the sound quality may be poor, and I think on one, perhaps the last one I forgot to amplify it in audacity, so you may need to turn it up.

When ever I record stuff, it is probably my first time to sit down with the instrument, so It is not as if I really know what I am doing with it. This means there still could be a whole lot of cool unfound (apparently unfound isn't a word) sounds in them. Also all patterns, and/or beats you hear are independently produced by the instrument. I'm just turning knobs:


This one is #15 working all by itself


This one is #14 being modulated by #15


This one is #13 being modulated by #15


This one is #15 being modulated by #13

Wednesday, November 28, 2007

#14


#14
Originally uploaded by preposterousman
Here is number 14. This really is meant to be used with something which I have yet to make, but is in the works.

It has a pitch knob, witch pitches it up, and a distortion knob. For some reason I couldn't make the distortion knob do any cool stuff while I was recording in audacity, therefor the sound sample only demonstrates the pitch knob, but it really does some craziness through its own speaker, or amplified.

I fed this thing through number 13, and some really wacky sounds came out, and one day I may record that and post it.

Sound sample(just the pitch knob, everyone):


Saturday, November 17, 2007

#13

Want to play with this? Well you will need to buy it. If interested click here. Audio and video at the bottom.

I did it again everyone! Meet #13 (to the left). Of all the things I have made, I like this one most.

I still am no good at describing these things, but I'll give it my best shot.

It generates a simple tone, which is then controlled by eight potentiometers (knobs), and four toggle switches. Five of the potentiometers control pitch; three pitch it up, and two pitch it down.

It is necessary to have all those pots for pitch, as precise control comes into play when the tone is fed into the modulation circuit.

The tone generation circuit has three switches which control it. All three need to be on, but only one can affect the sound, that being the middle one, if my memory serves me. When switched off it deactivates the tone, but in a pleasant way.

It has a separate circuit that the tone is fed into to modulate the sound further. This circuit has one switch, top middle, to turn it on, and three pots, which add different distortion, and generally do insane things. I got five commas in that last sentence.

This really can produce a lot of sounds and I am super proud of it. It also has an input into the sound modulation circuit, and an out put, to your favorite computer, or amp, or tv. Both are rca.

It also features a 1" x 1" likeness of its maker above the top middle knob.

Audio. Its long cause I was just goofing on it, had no real plan, but it gets good nearer the end, so listen to the whole of it:


You really need to see a video, as that would demonstrate how you can control it like a theremin.

Video:

Look for this when I can convince my friend to bring his camera to my house, or I travel over to his. Worst case scenario, it will be next Sunday before I can get it done.

Friday, November 9, 2007

How to operate #11

Here is the manual for the assembly and operation of my eleventh instrument.

In the picture below, we can see the brackets on the back of the ca-110 to which the smaller keyboard will be attached


Here the ca-110 is preparing it self to recieve the smaller keyboard.


Unfortunately the camera didn't focus the way I hoped it would, but here are the bolts which will be placed inside the brackets, on the back of the ca-110.


When the ca-110 brackets are fitted over the smaller keyboards bolts, there will be no room to place your nut onto the smaller keyboards bolt. For that reason you can see I am holding the ca-110 up while I place, and turn the nut a few times.


Below is the hole which will receive the bolt for the control box. With the ca-110 held upside-down, it will be to the right of the smaller keyboard.


The bracket on the control box:


First connect the control box to the smaller keyboard; it should be obvious how to do so.


Place the bolt through the hole, form the back, so the nut will be tightened against the control box bracket.


Nextly, find the wire which ought to be protruding from the underside of the ca-110, and attach it to the connector closest to the yellow portion of the control box, like so:


Finally attach the voice changer to the only available connector. It will only go in one way.


Next I will explain the control box:


First the color scheme. The green controls belong to the smaller keyboard. The black belong to the voice changer, and the yellow controls the ca-110.

Knobs, such as greens 1a, correspond to a switch, so to use knob 1a you must flip switch 1.

The toggle switches are on/off/(on), which means one side of the switch is momentary. Flip any switch down and it will stay on, flip it up and it will momentarily stay on. This will not matter though, as no bends were attached to the up position of any switch, or no important bends that is.

The yellow controls are momentary push buttons, ad are not meant to be held down, though holding them down may garner results.

Now for what they actually do.

Green:
1:
Activates pitch and distortion bends which are controlled by the knobs 1a, and 1b simultaneously. Unfortunately these bends work best when not amplified, that is to say, when fed through the smaller keyboards speaker. The bends can be random, and two knobs are necessary to fine tune, and control them.
(If you don't want to amplify this bend, but still want to use the voice changer to add distortion, you could mic the smaller keyboard's speaker, and then feed the output of your computer/amp, into the voice changer, and out again)

2:
Distortion

3:
Activates a sustained tone. You can change the tone by pressing a key twice. Different bends from the voice box, and the smaller keyboard can be layered on top to create pretty interesting effects.

4:Distortion

Black:
Black controls correspond to the voice box, as stated earlier. The voice box itself has three settings, alien, monster, and amplify. The three black controls will work with the voice box set to any of its own settings.

1:
I believe this activates a tone, just as green 3 does.

2:
Pitch, to be controlled by knob 2a

3:
Distortion

Yellow:

1,2,3:
Random glitches. Use demo mode or select a beat, and then press a button quickly. They can easily crash the ca-110, but pressing repeatedly can bring it back to life. If not turn the ca-110 off, and then back on. Using these buttons will be trial and error.

Now to explain the wiring:


The outputs, and inputs, are marked on the ca-110, and the smaller keyboard, but not on the voice box. The left side, as pictured above, has two inputs, 1, an 1/8" inch, and 2, a 1/4". The right side has two out puts, 3, 1/8", and 4, 1/4".

To use the keyboards with the voice box (anything that has an output which is, or can be adapted to, 1/8" or 1/4" can be used with the voice box; this includes guitar, and microphone.) simply plug the outputs from both into the inputs of the voice box, and then choose which voice box output you'd like to use, and plug that into your computer, or amp, or whatever.

I have been working on this project for a long time, and because of that I tend to worry about how good it is, but soon Dylan will share with us all how well it works.

Sunday, November 4, 2007

Robusto, #12

If you would like to trade some cash for this, click here.

I finished the technical aspects of this piece a while ago, but just recently put the finishing touches on it. It functions rather well, and is capable of a lot.

I am sort of at a loss on how to describe it. It is the first non toy(though I did make it from a toy) I have made. I used some on/off/momentary toggle switches. The bottom right switch turns it on, or plays a tone rather. The down position is the permanent one, and plays a high tone, while pushing it up will play the low tone momentarily.

The knobs all do strange things including some distortion, and pitch stuff. Its best to watch the video to see how it all works:


It has two momentary switches, one which acts just as the high tone toggle switch does, and the other activates some distortion, which is fed through a capacitor, so it sounds pretty weird.

It also has a body contact which adds rather random effects, though generally just pitch. If you can get the setting just right, it will even act as an antenna, and you can control pitch without even touching it, sort of like a theremin.

It has a speaker, and an 1/8" audio output, and it is all cased within a cigar box.

Monday, October 22, 2007

Well I did it! Or bend 11

I am finished with all of the technical stuff with the casio ca-110. I'm sorry it took me so long, and I'm also sorry that I didn't document very well. I get into working, and I can't get out, cause if I do it is definitely possible I would never return to finish.

For those non-believers, here is a video briefly explaining the ins and outs of its functionality. I should make a video tomorrow of it operating.


Tuesday, October 2, 2007

#10 Y'all

Click here if you want to practice ownership.

Yeah I just finished it. I actually did most of the work, and put it back together yesterday, but then realized I hadn't put in an output. I used up all my 1/8" jacks, so I put in an rca, or composite, or whatever, out.

It is operated entirely by five body contacts. When you toch them in combination, you get many pitch, and distortion bends.

I mistakenly bought it without realizing the one who operates it might be grateful for a battery cover. You can see my ingenious solution in the second picture. It's a good thing I never throw any useful thing away.

As an interesting aside; the screws which secure the batteries came from a computer desk which I burned a few months ago. It was the kind that had some shelves inside of a cabinet on top. To digress from my aside, I had earlier removed one of the shelves to paint a picture of my mothers dog on it. Back to my original tangent, when I decided to burn it (not because of some dangerous defect in my personality, but because it is the easiest way to get rid of large wooden trash in the country), I didn't want to take the whole thing apart, so in a impressive feat of strength I heaved the thing over my head and threw it some distance. It broke into many, easily incinerated pieces, and I, consequently, hurt my back. You may be asking yourself, "if you broke it so you wouldn't have to take it apart, how did you get the screws?". To that I say, mind your own business.

A sound sample:


What I did to it:

1) Added five body contacts
2) Added an rca output.

Friday, September 28, 2007

A little difficult

Well, I got down to the task of bending Dylan's Casio today, and it proved to be a tiny bit more difficult than I anticipated. The first surprise, was that it opened out, which makes working rather precarious. I figured out what the trouble was with the batteries. As you can plainly see the spring was bent behind a piece of plastic. I bent it back, and will most likely fix it so that won't happen again. The speaker wires were holding me up, so I un/de-soldered them from the speaker and moved it out of the case, and then reattached it.

You can see in the third picture that I had all of the parts exposed, but the side I want to solder all my wires, and what not, to is on the other side of the board. In the fourth picture you see that once the board is unscrewed, and the underside exposed, all of the switches (on/off, volume, and accompaniment volume) are now rendered useless, making the keyboard rather usless.

I spent a while trying to figure that one out. I tried to follow the circuit to soldering points and then hard wire the switches closed, but that didn't work. Then I realized that the black points that the switches connect probably act as resistors for some reason, so I added resistors to my hard wiring scheme, and it worked.

The last picture shows the working keyboard. The volume switch must be engaged for any sound to be heard, but instead of hard wiring the switch closed I just took the top part of the switch out, laid it across the connections, and put a pair of pliers on top. It does the job.

Design by Dzelque Blogger Templates 2008

Preposterous - Design by Dzelque Blogger Templates 2008